With Red Hat OpenShift 4.9 Generally Available yesterday (10/18/21), I figured I would see how easy it was to lay down Single Node OpenShift on a baremetal server using the Assisted Installer available from console.redhat.com. Short answer, it was 90 minutes easy.

What I had ahead of time:
- Laptop
- Server
- Internet
- Account at http://console.redhat.com
- USB drive
- BalenaEtcher
Now comes the exciting details…

Start Time: 10/19/2021, 8:30:38 AM
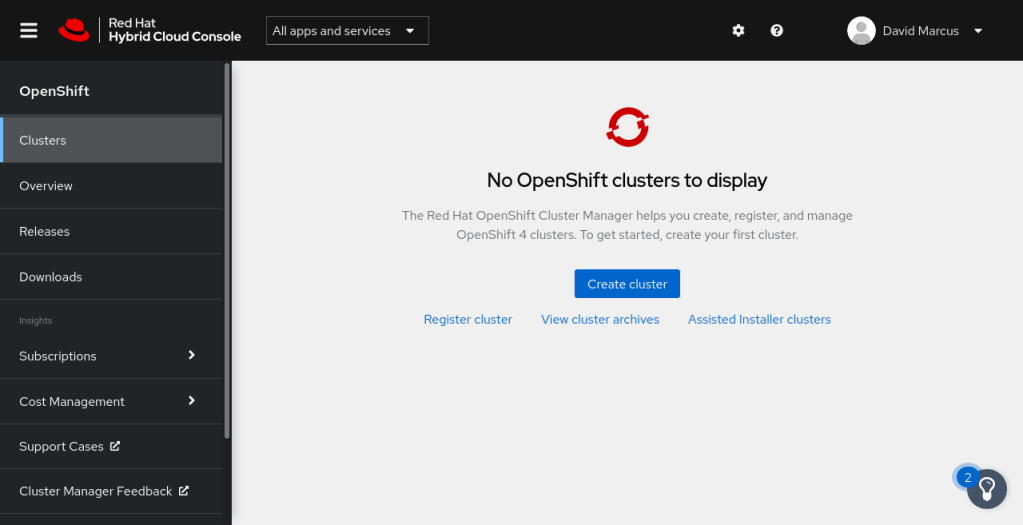
- On my laptop, log into https://console.redhat.com/openshift
- Select “Assisted Installer clusters”
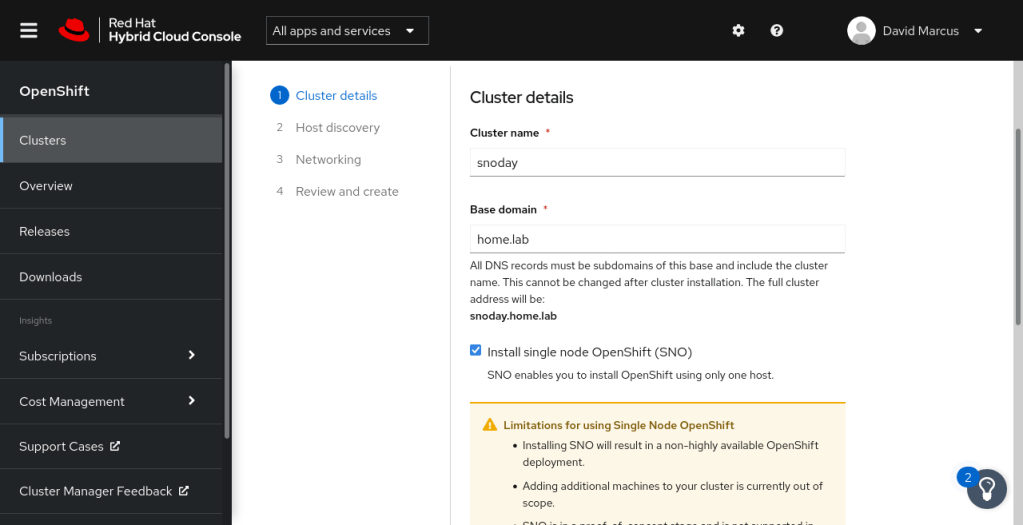
- Select “Create New Cluster”
- Enter Cluster name: “snoday”
- Enter Base domain: “home.lab”
- Select Install single node OpenShift (“SNO”)
- Accept the Limitations
- Installing SNO will result in a non-highly available OpenShift deployment.
- Adding additional machines to your cluster is currently out of scope.
- SNO is in a proof-of-concept stage and is not supported in any way.
- OpenShift in-place upgrades aren’t expected to work with SNO. If an upgrade is needed, your system will need a redeployment.
- Select OpenShift 4.9.0-rc.4
- The other available stable option is 4.8.12, which you can certainly try. Release notes.
- Leave the pull secret deselected
- Next
- If you Select Install OpenShift Virtualization, it will consume an additional 150 MiB of memory, 4 CPUs and require persistent storage.
- Recommend keep it simple the first time
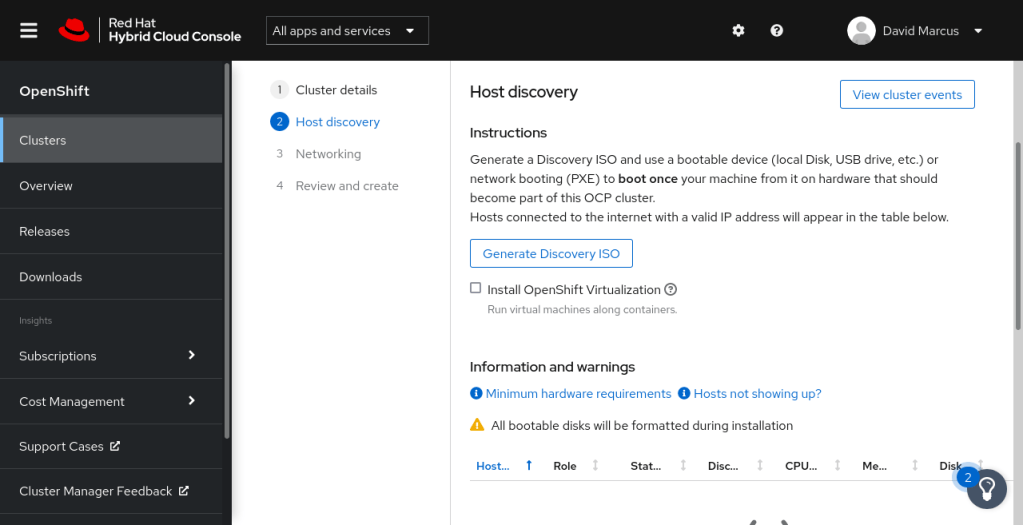
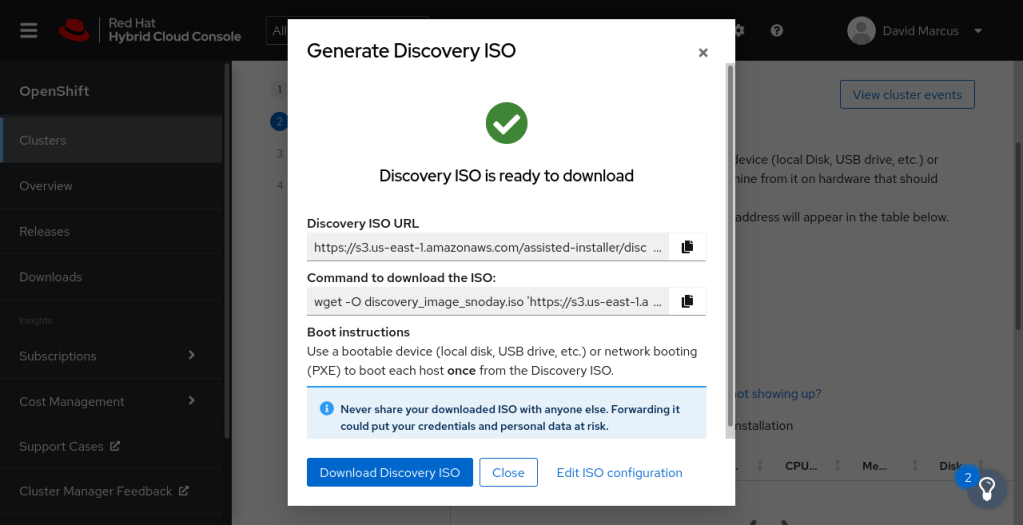
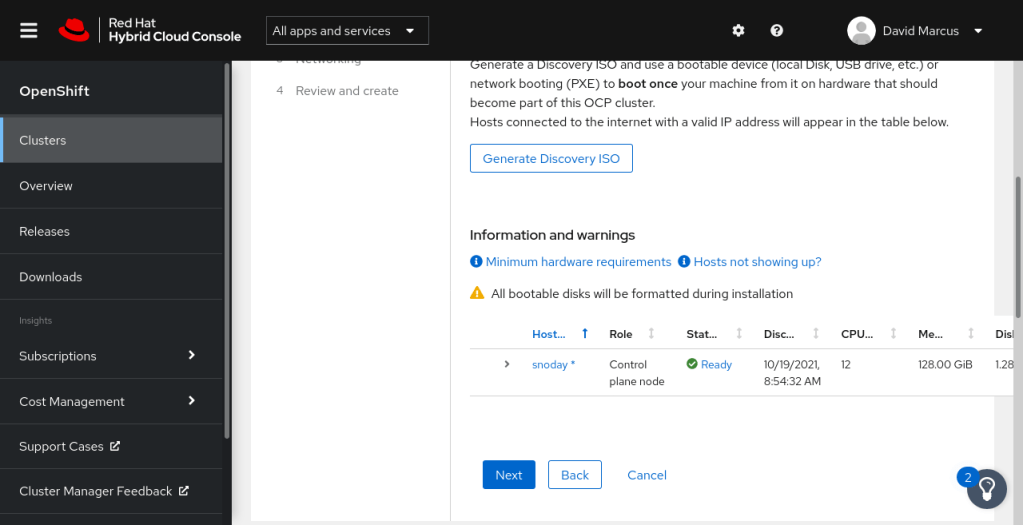
- Select “Generate Discovery ISO”
- Select “Full image file: Provision with physical media”
- Drop or copy/paste SSH public key from my laptop ~/.ssh/id_rsa.pub
- Leave cluster wide proxy settings deselected
- Select “Generate Discovery ISO”
- Select “Download Discovery ISO” (~993 MB download took less than 2 minutes)
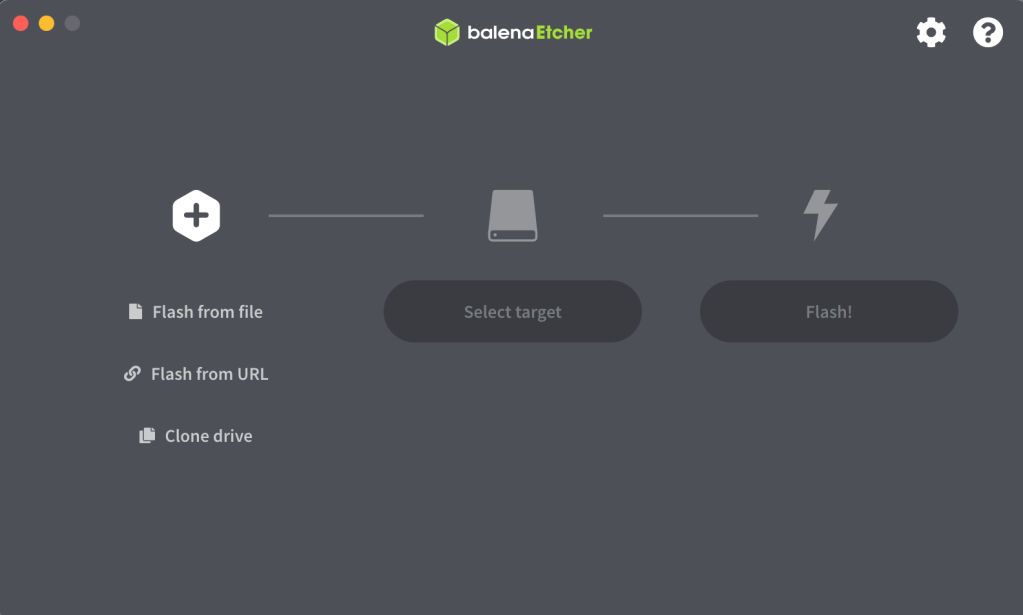
- Launch BalenaEtcher
- Select “Flash from File”
- Select Target (insert your USB drive to the machine you are currently working from)
- Select Flash
- Move the USB (with the flashed ISO) to the computer you plan to install/run SNO
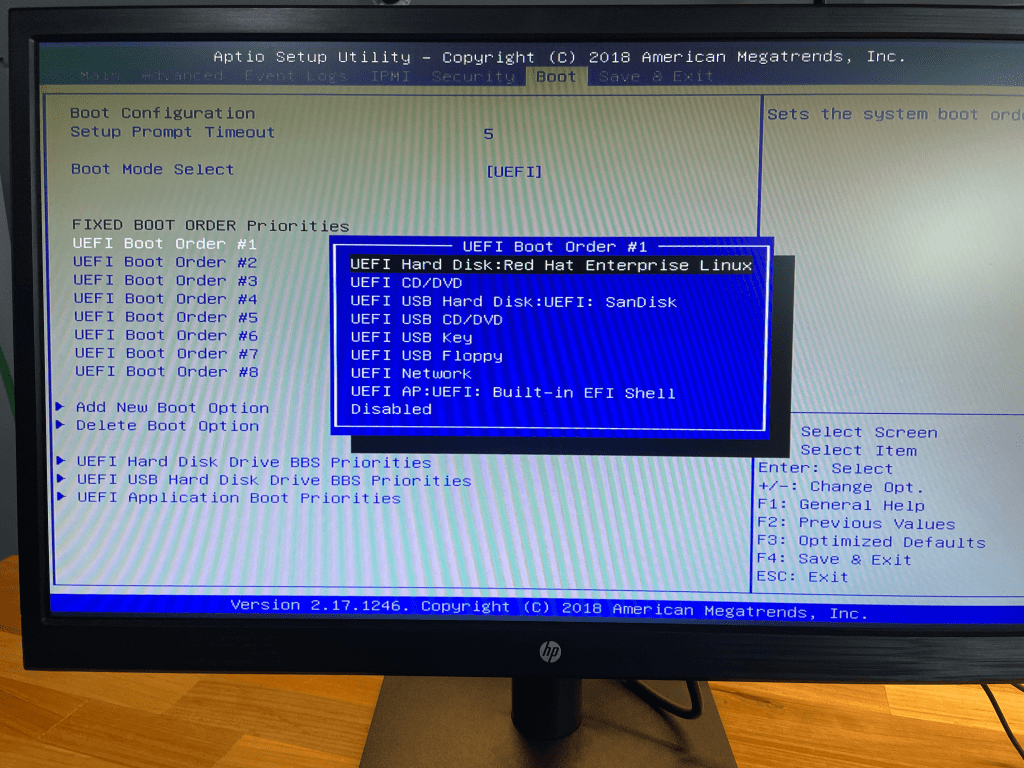
- On your server, on bootup hit Delete key to enter the Boot Menu and select the USB key that has the ISO as the primary
- Save the changes to the Boot Menu and Restart (this should reboot the machine and start the RHCOS installation)
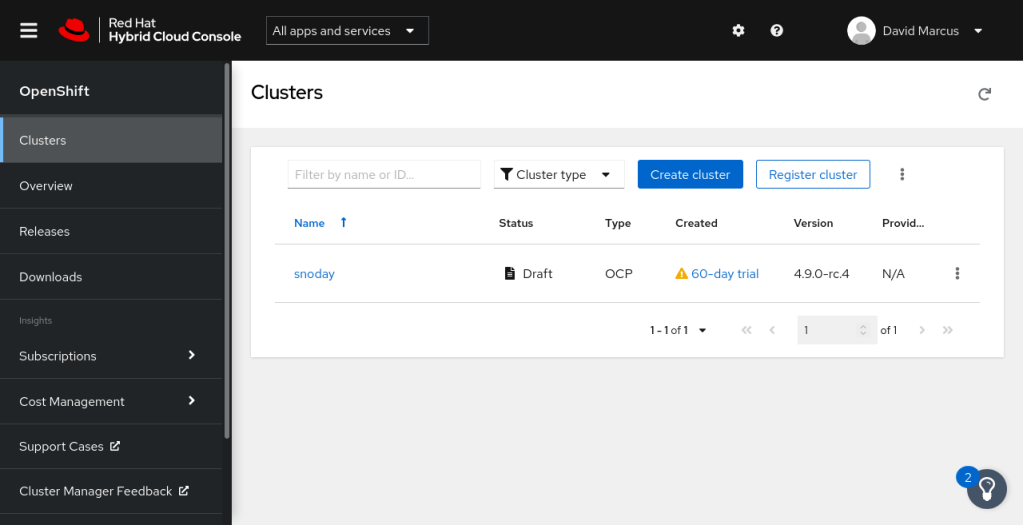
- On your laptop, Go to https://console.redhat.com/openshift/assisted-installer/clusters
- Select the snoday host listed in the clusters
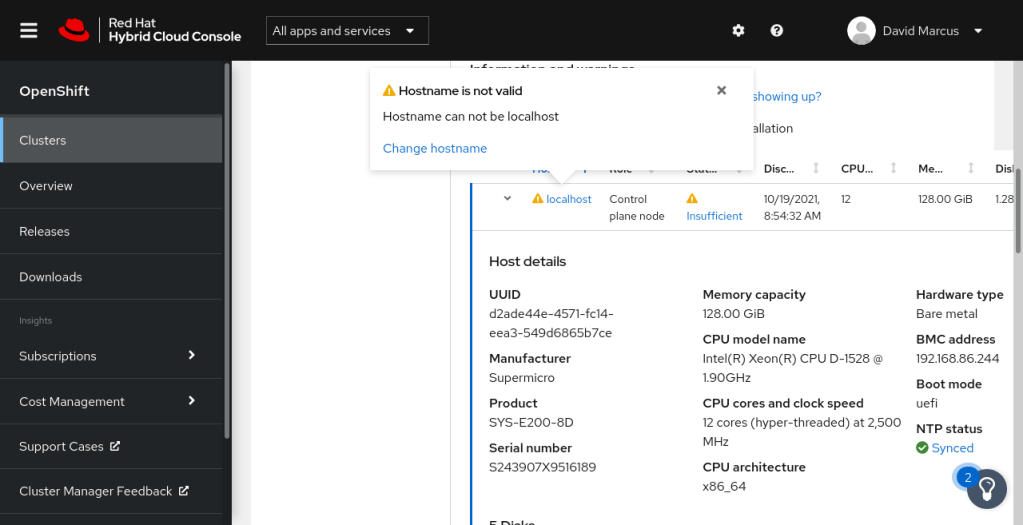
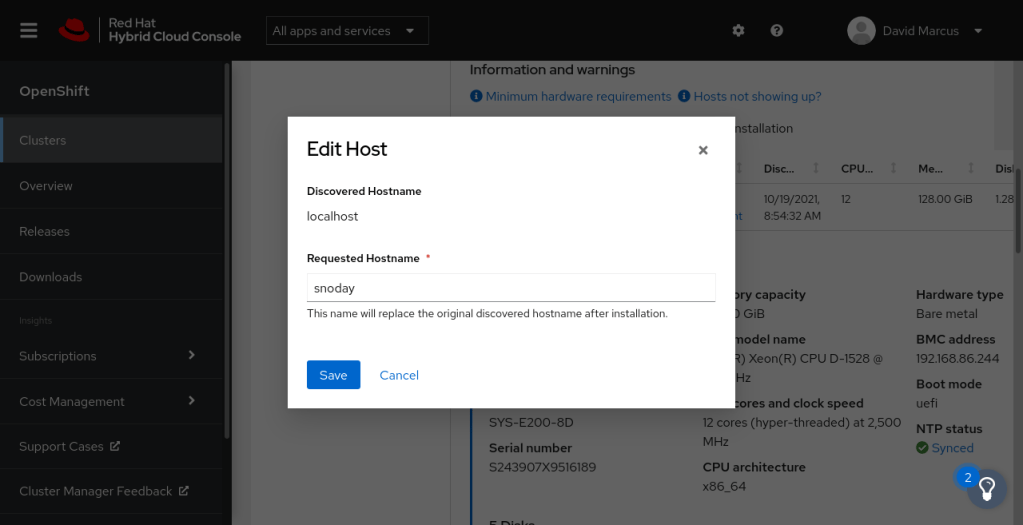
- Review the details about your server
- Update the Hostname from localhost to “snoday”
- Update the NTP Servers with “208.67.222.222, 208.67.220.220”
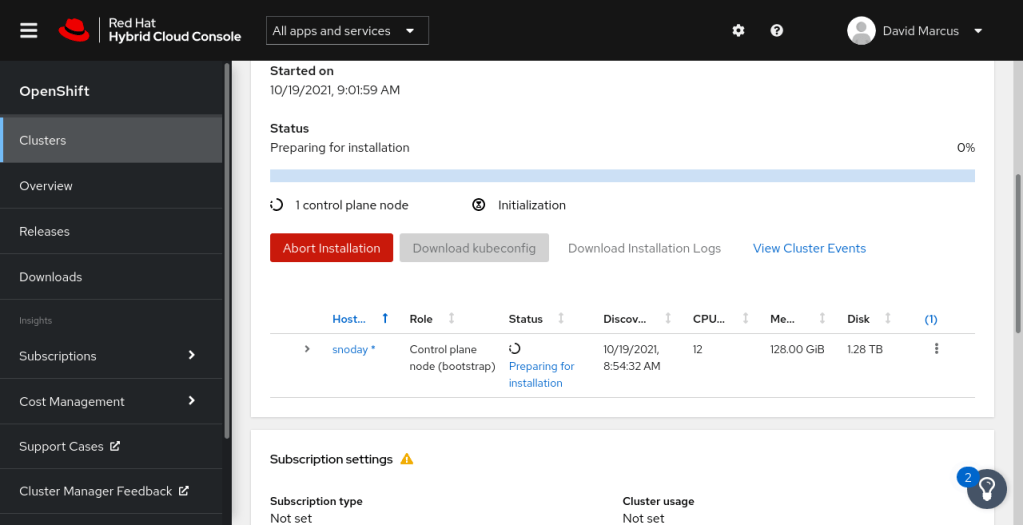
- Verify status is “Ready”
- Next
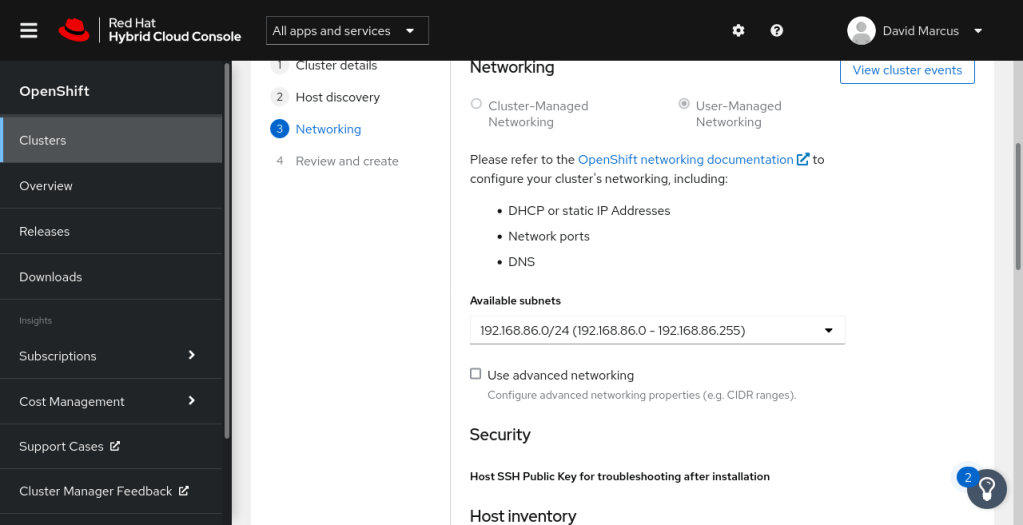
- Select the Available subnets
- If you Select advanced networking you can configure:
- the IP block for Pod IPs to be allocated, the subnet prefix based on the number of workloads to be assigned, the Service Network, only use this if you are accessing services externally, and choose between SDN (stable recommended the first time) or OVN (new)
- Select “use the same host discovery SSH key”
- Next
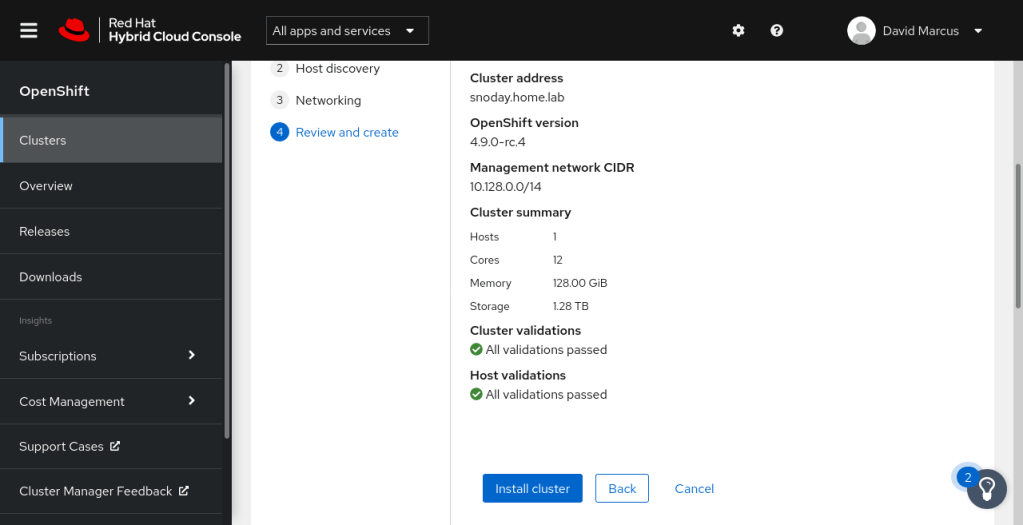
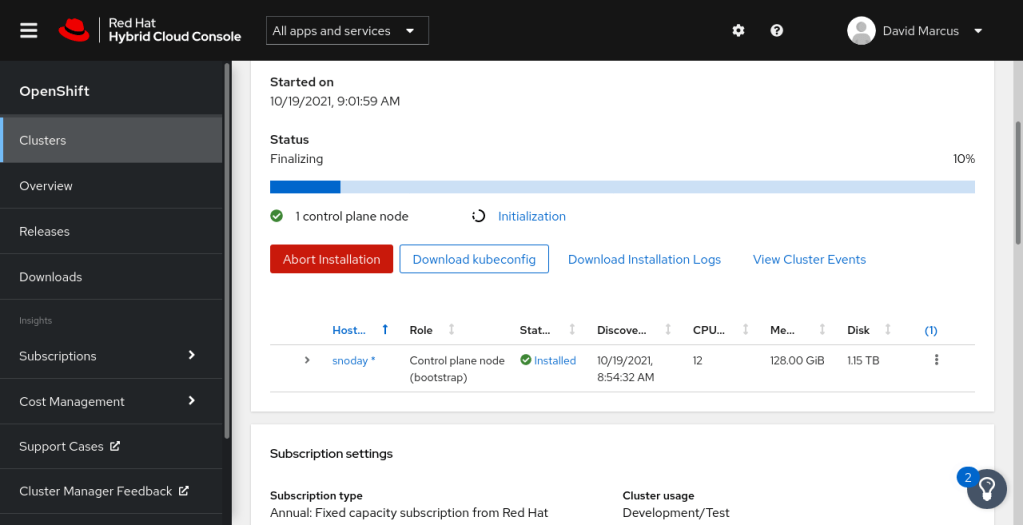
- Select Install cluster, but don’t go too far
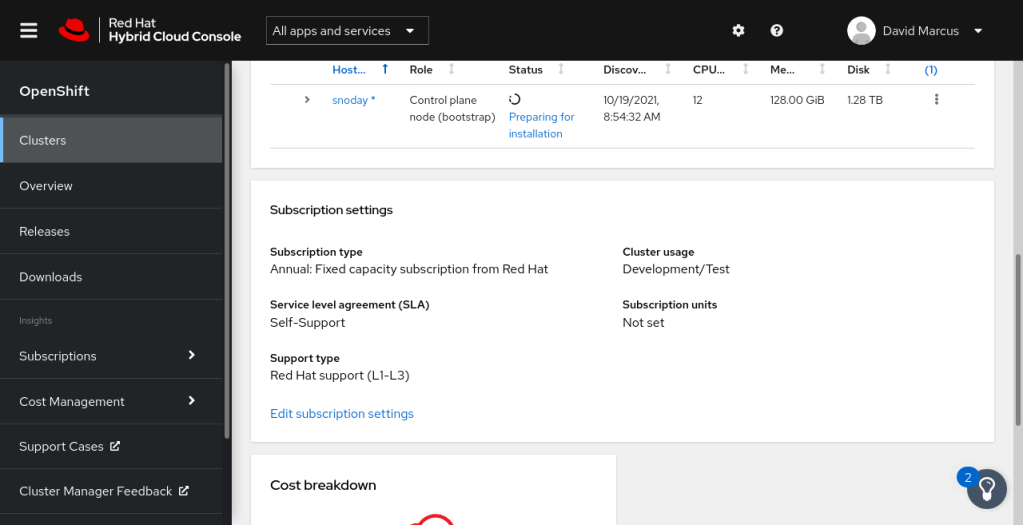
- Update Subscription Settings
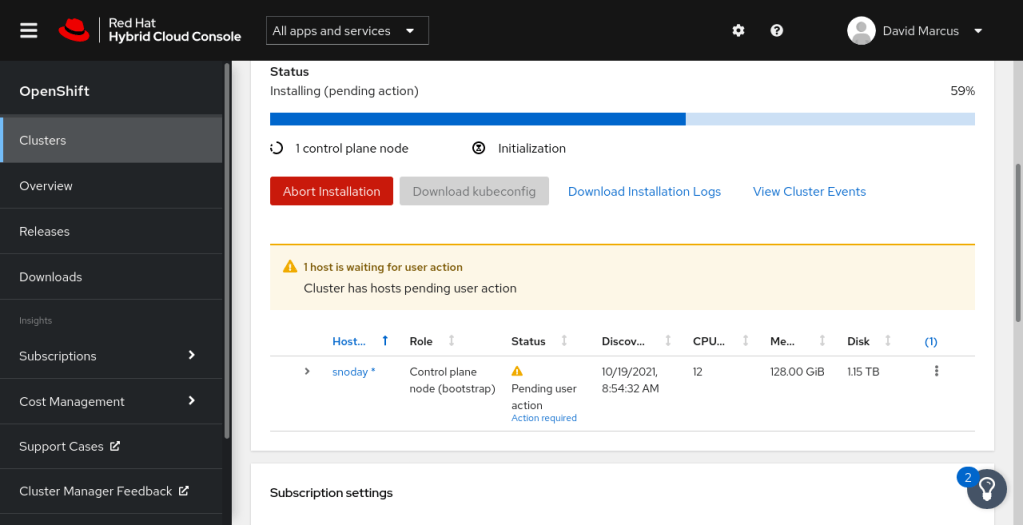
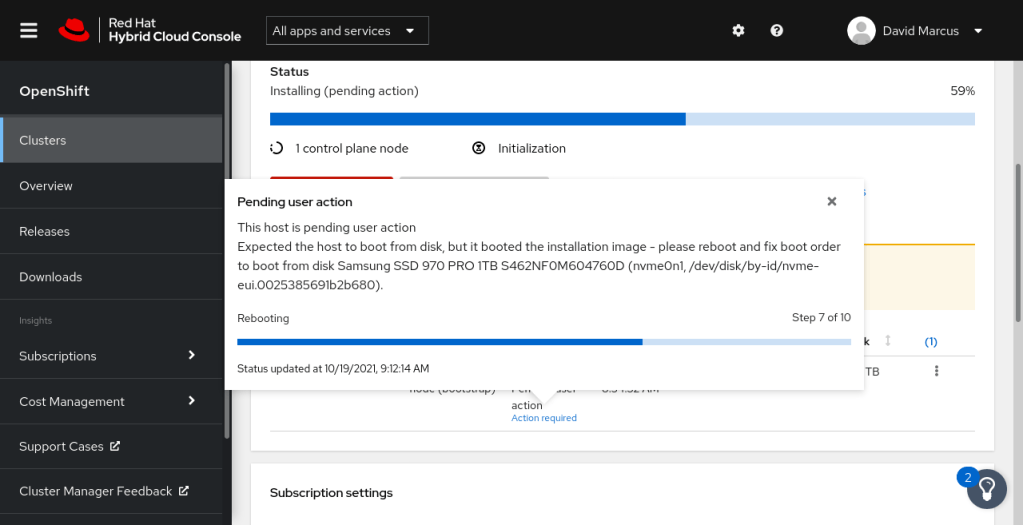
- An alert may display “Pending User Action” requiring boot order change
- please reboot and fix boot order to boot…
- Remove the USB prior to reboot
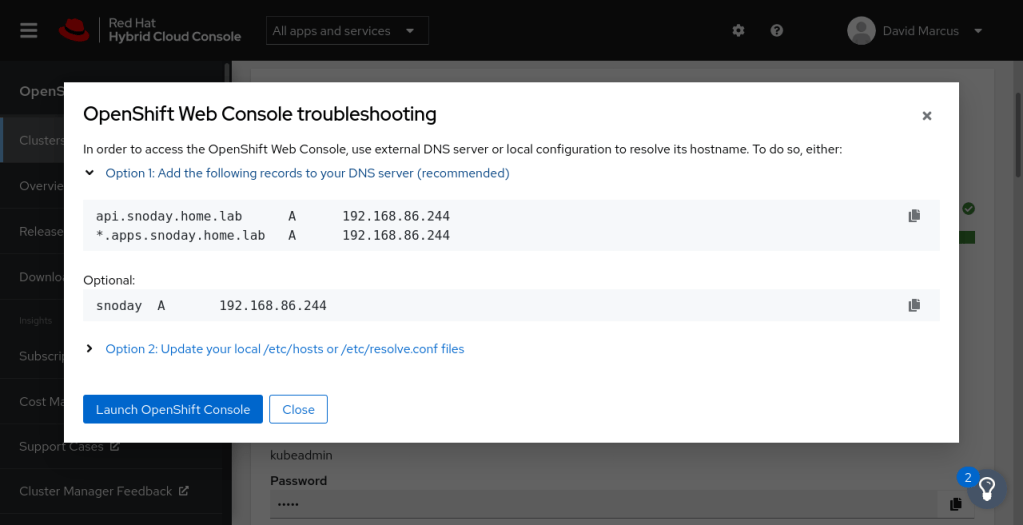
- From console.redhat.com/openshift, under Web Console URL click the “Not able to access the web console?” link
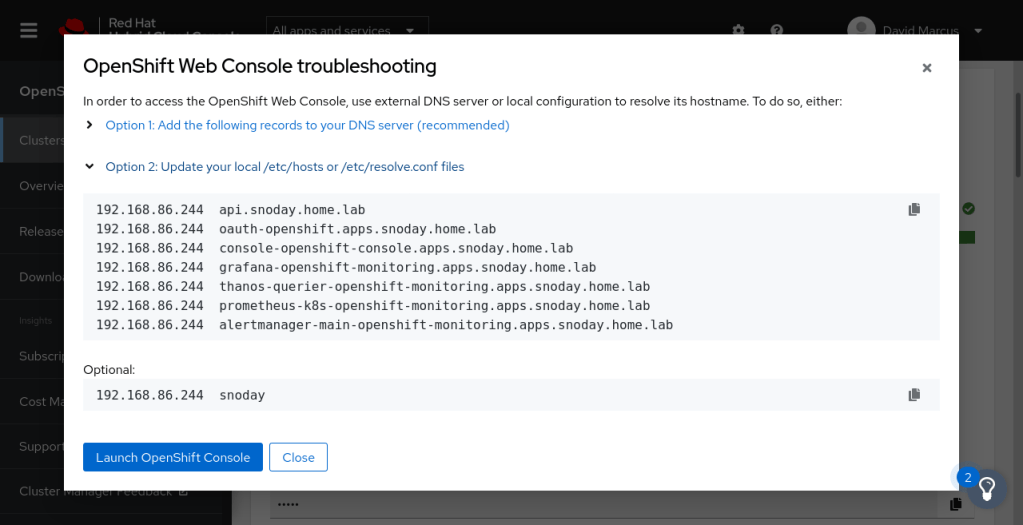
- Update either a) your DNS server or b) your /etc/hosts on your laptop
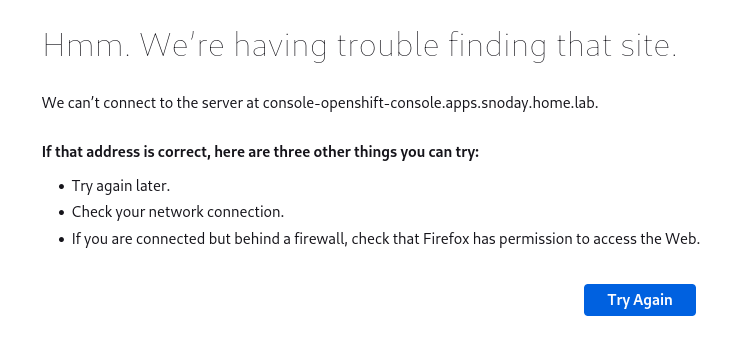
- From the terminal, append the entries to /etc/hosts provided in step #40 to correct the “We’re having trouble finding that site” error.
- Go to https://console-openshift-console.apps.snoday.home.lab/
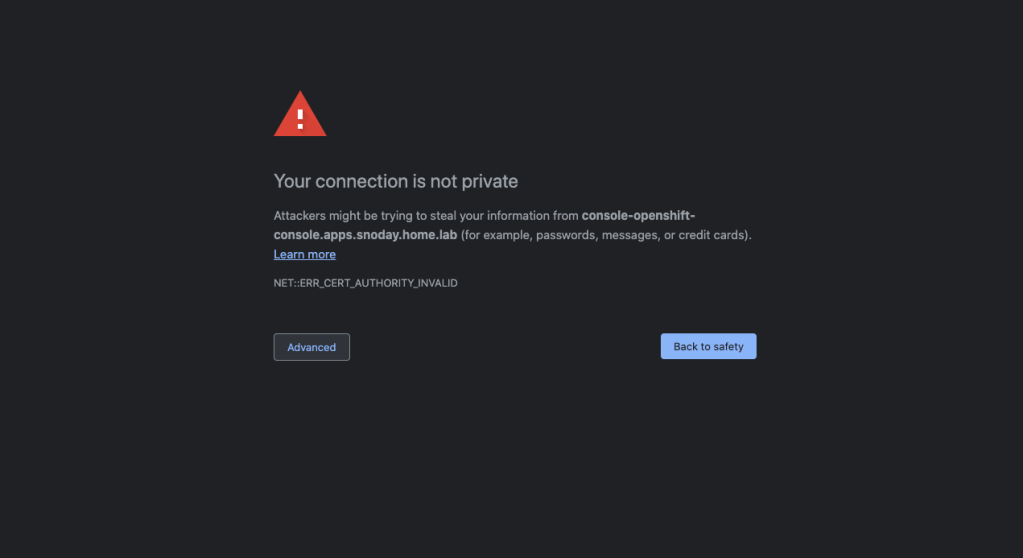
- If you get “Your connection is not private” error, OpenShift uses a self-signed certificate that you have to accept in order to access the console.
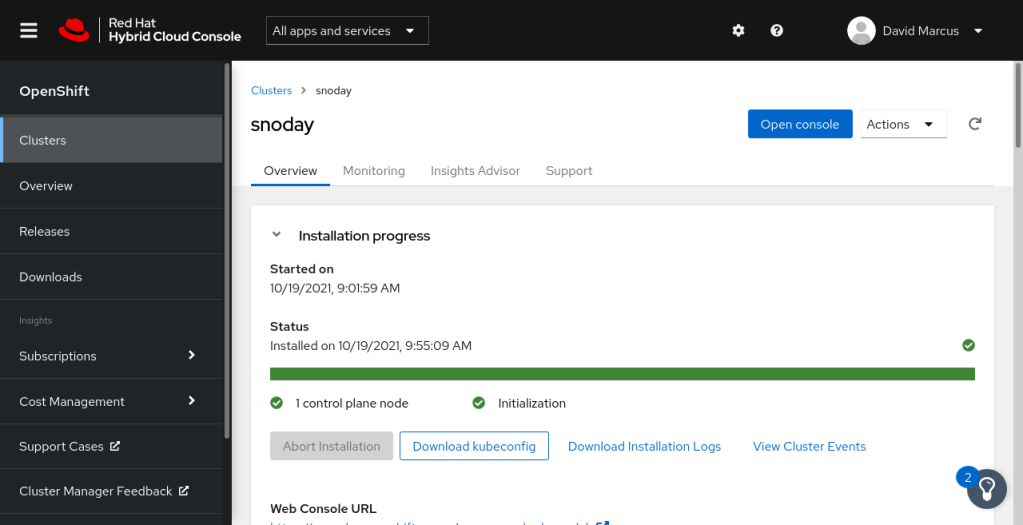
Stop. End Time: Installed on 10/19/2021, 9:55:09 AM
You might be thinking…now what…me too and it seems like installing Kubeflow or OpenDataHub to start some machine learning. Or, send some data from a sensor installed on a single board computer.